|
|
Post by privateryan on Aug 21, 2007 20:26:53 GMT -5
[glow=green,2,300]Step 1:[/glow] Gather your materials. The flock is Woodland Scenics fine black ballast, the wood is bits of balsa and the two plastic pieces are small GW IG bits. The important part of basing is to place one key focal point element in the middle, in this case, I will choose bits of metal from a fallen airplane or tank treads. Remember as you gather your supplies to find one piece that will be your main focus of attention. 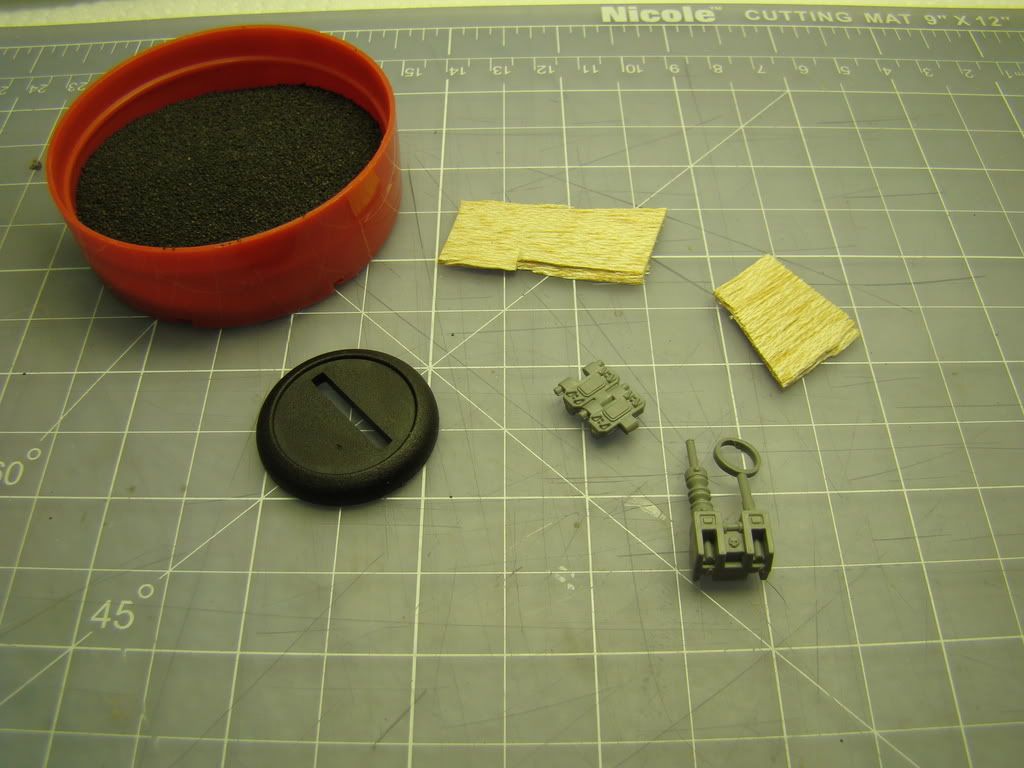 |
|
|
|
Post by privateryan on Aug 21, 2007 20:29:39 GMT -5
[glow=green,2,300]Step 2:[/glow] Lay the pieces in an order of what you would like to see at the end so that when you start glueing you know where to place things. This step is merely to help you organize yourself and give you some semblance of an idea of what you want at the end of the project. Here I have placed the tank tread as my main focus point with bits of wood strewn about. Remember, do not crowd the base, I would say no more than what you see in terms of individual pieces as you still need room for the flock to go in between the pieces. 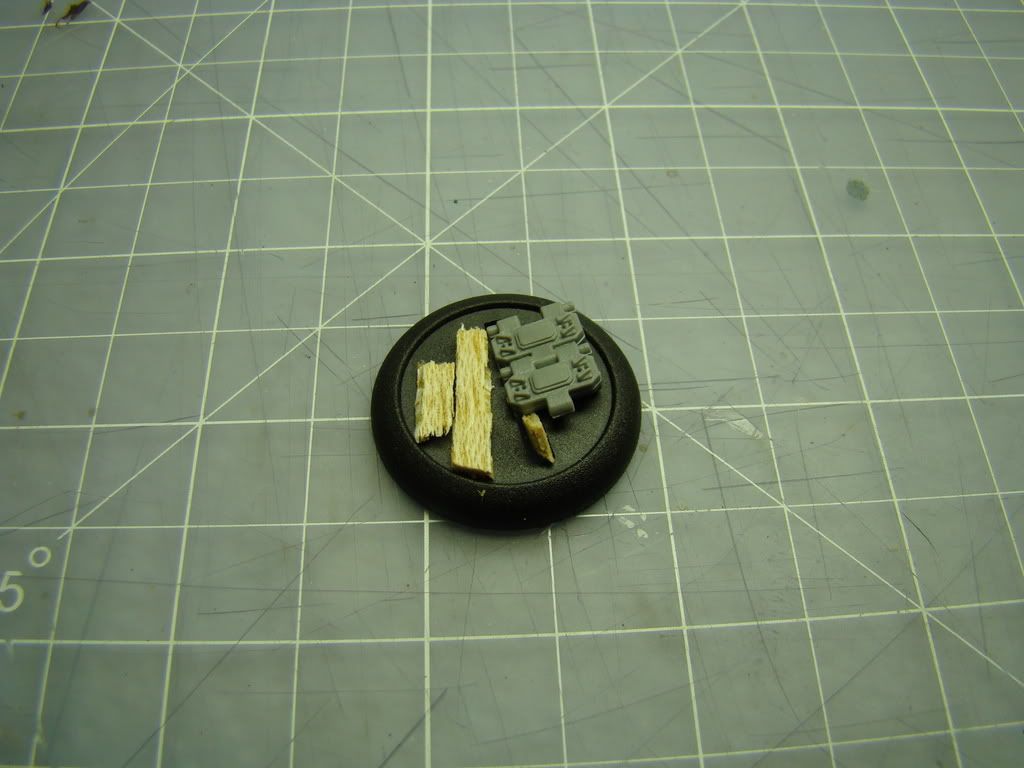 |
|
|
|
Post by privateryan on Aug 21, 2007 20:32:12 GMT -5
[glow=Green,2,300]Step 3:[/glow] Cover the inside circle with glue, do not worry if the glue does not cover up the tab slot. I used Gale Force Nine super glue. Place the pieces in the order you found in step 2. Once you feel the pieces are in the right place dunk the base in the small bin of flock pictured in step 1 and make sure any areas that are not covered by bits are now covered by flock. 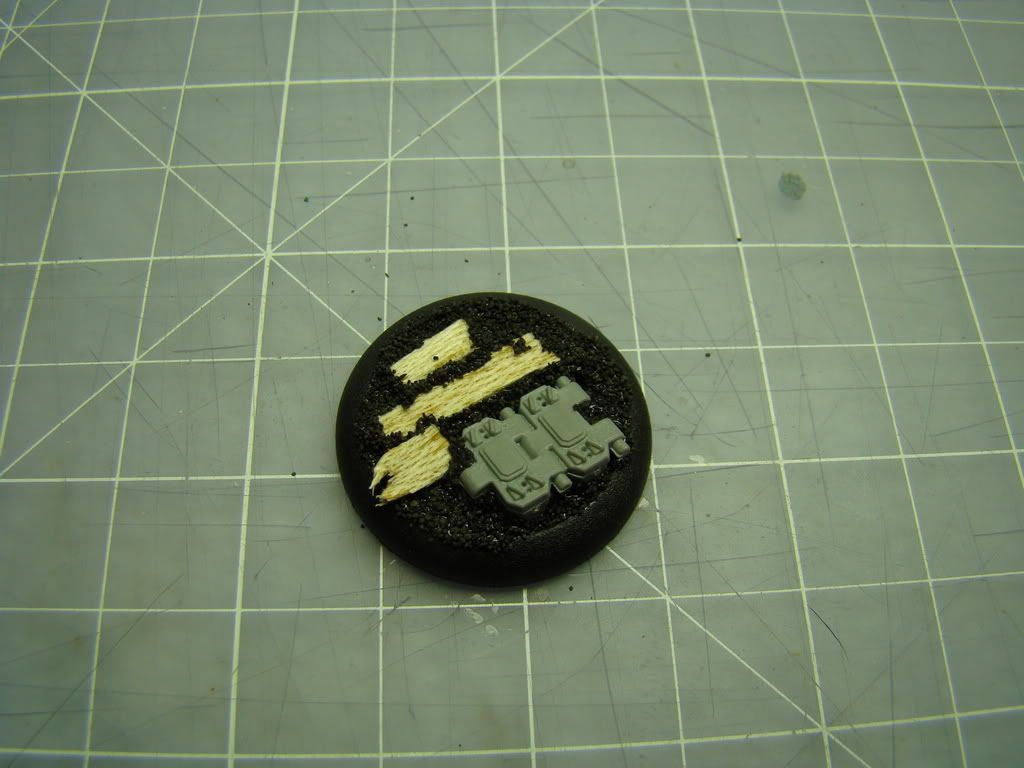 |
|
|
|
Post by privateryan on Aug 21, 2007 20:33:20 GMT -5
Here is another example of a base using different bits. Notice the placement of pieces and the number of pieces, this is important! 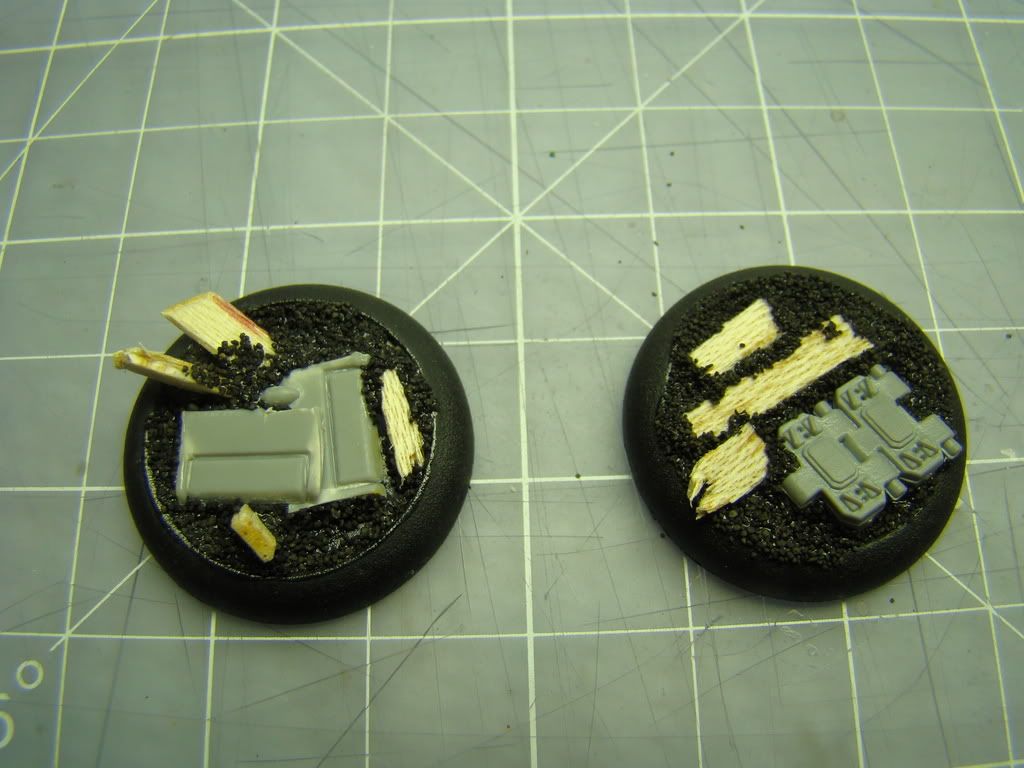 |
|
|
|
Post by privateryan on Aug 21, 2007 20:35:04 GMT -5
[glow=green,2,300]Step 4:[/glow] Prime the base once the glue dries. I used fine white tamaiya primer. It may be easier to use black primer as you will see in the painting steps to come. Make sure to really dust the pieces well as you almost want the primer to lay thick on the metal pieces to give them a good texture. 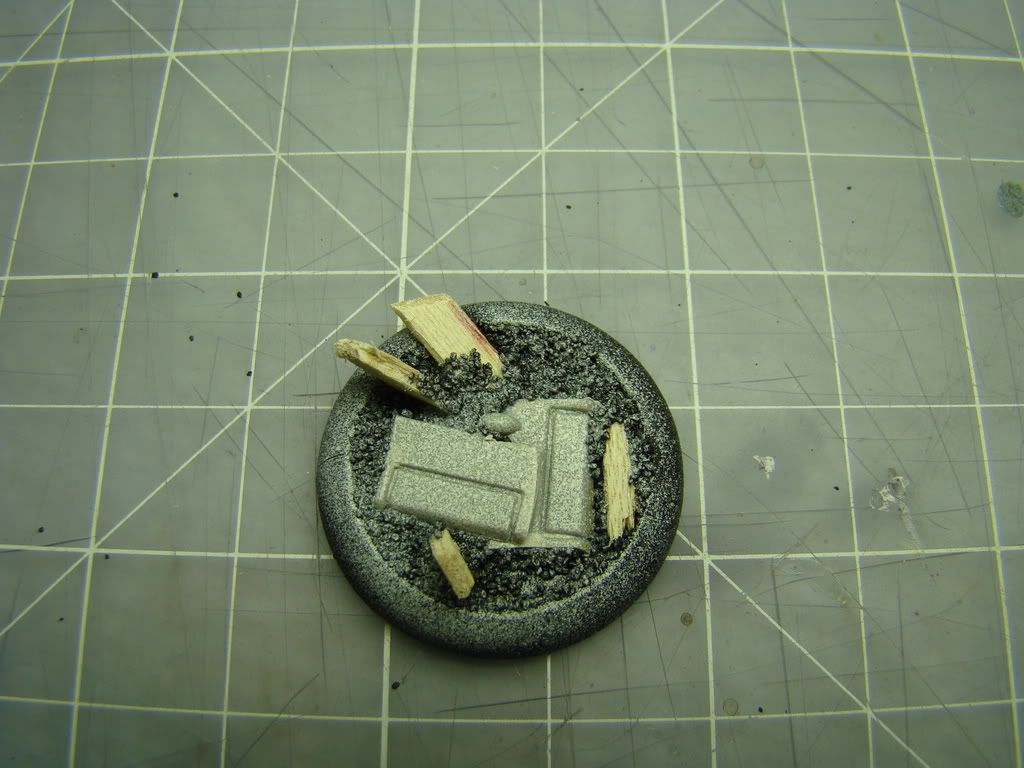 |
|
|
|
Post by privateryan on Aug 22, 2007 8:35:12 GMT -5
[glow=green,2,300]Step 5:[/glow] Paint the entire base black. I used GW Chaos Black. If you primed with black, just make sure the whole thing is black as sometimes even when you prime you do not get an even cover. 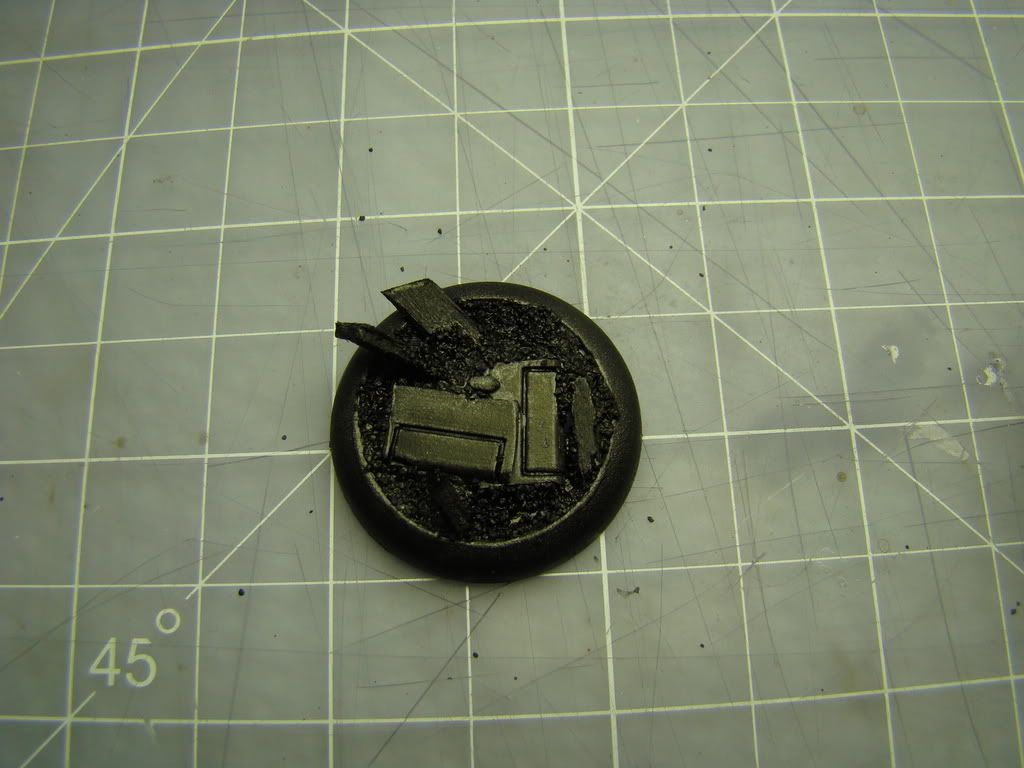 |
|
|
|
Post by privateryan on Aug 22, 2007 8:36:51 GMT -5
[glow=green,2,300]Step 6:[/glow] Paint the wood and the flock a dark brown. I used Vallejo Flat Brown. It is ok if you get paint in the metal areas or on the base, that can be cleaned up later. Also, the paint does not really matter as this will be the official basecoat so if you overbrush or slop it on it is ok. 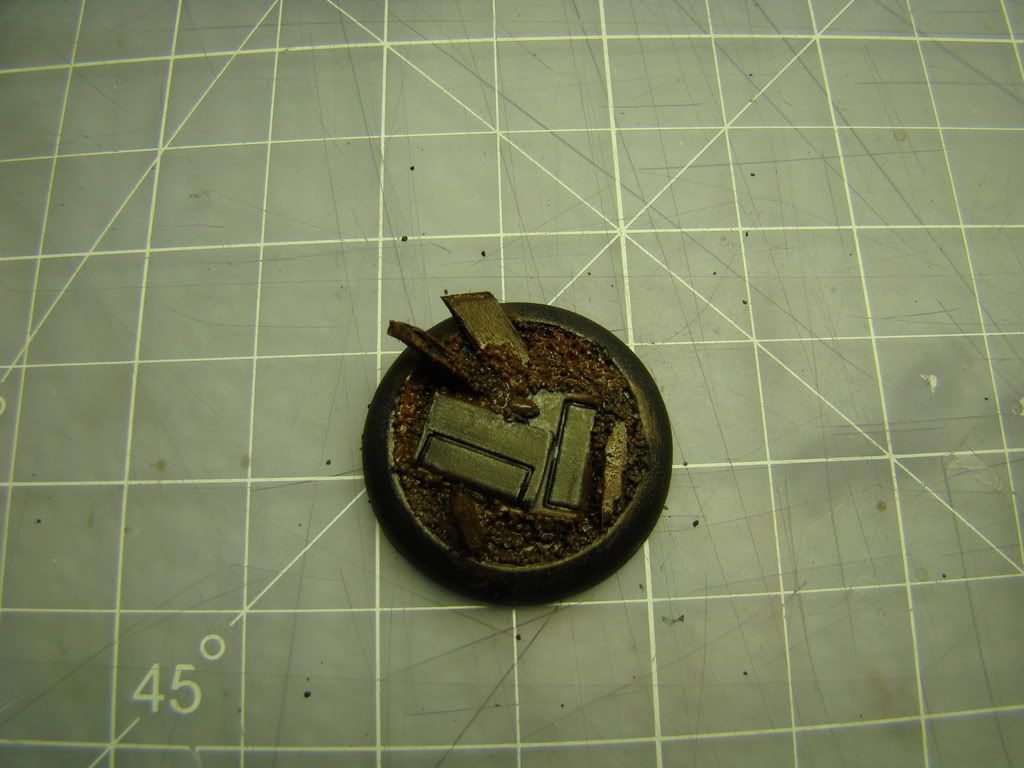 |
|
|
|
Post by privateryan on Aug 22, 2007 18:26:40 GMT -5
[glow=green,2,300]Step 7:[/glow] Drybrush, lightly, a lighter brown on top of the wood and flock. I used GW Vermin Brown. Make sure when you drybrush that your paint is not wet and you have little on the brush, you want to essentially dust the surface with your brush. 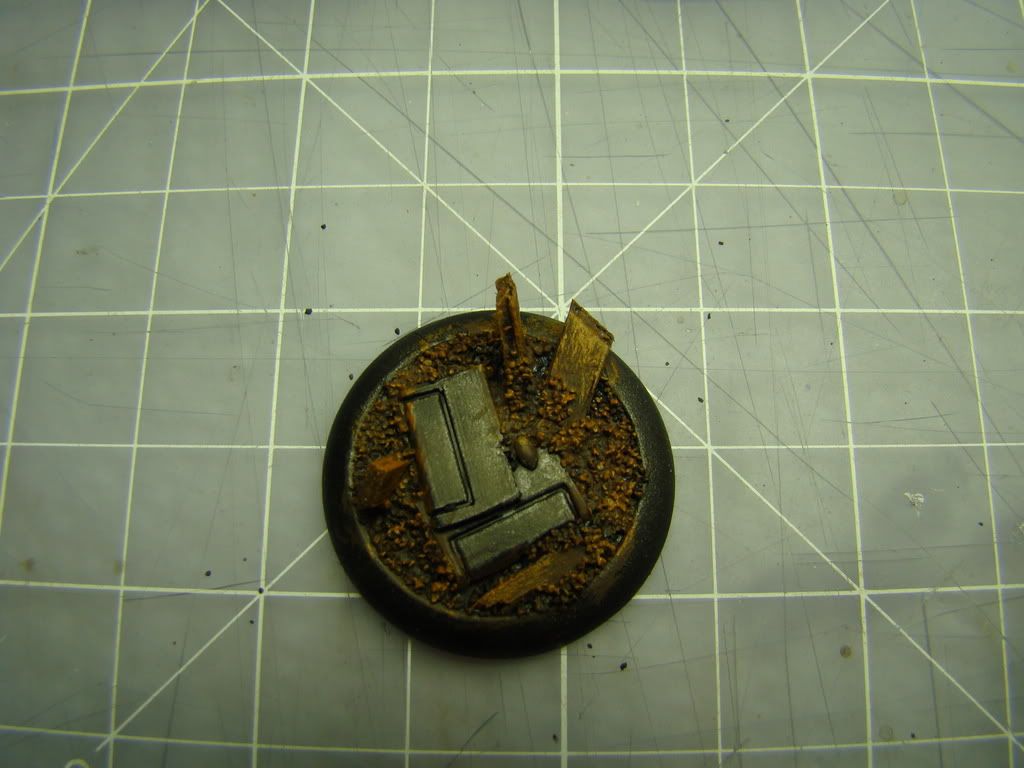 |
|
|
|
Post by privateryan on Aug 22, 2007 18:28:42 GMT -5
[glow=green,2,300]Step 8:[/glow] Now, add a dab of white to your brown that you used to highlight and re-drybrush over both the flock and the wood. I used a dab of skull white mixed with vermin brown giving me a cross between a flesh tone and a very light brown. This time, make the drybrush even lighter with less paint to really only hit the tips of the flock. Go heavier a bit on the wood as you want the lighter brown to really light up the wood as an ink later will darken it. That is: highlight the flock with the light brown less than the wood. 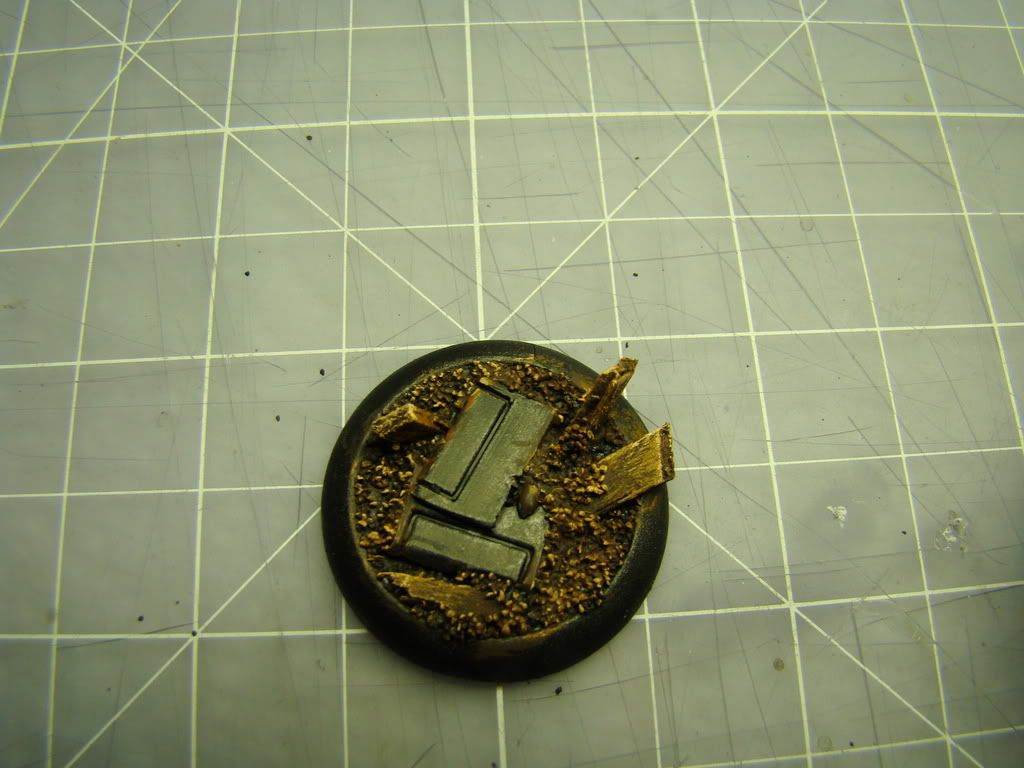 |
|
|
|
Post by privateryan on Aug 22, 2007 18:30:39 GMT -5
[glow=green,2,300]Step 9:[/glow] Drybrush the metal piece in the center. I used boltgun metal. Try and make sure you do not get any metal on the flock or wood. Use a smaller dry-brush if need be. I also washed the wood in this step as well. I used Flesh Wash (GW ink) and liberally applied it to the wood only. This will darken the wood, but really blend the light highlights and bring out the grains in the wood.  |
|
|
|
Post by privateryan on Aug 22, 2007 18:33:44 GMT -5
[glow=green,2,300]Step 10:[/glow] Wash the entire model with black, especially the metal. What I did was I dabbed my brush in chaos black and wet it, rubbed off a lot of paint, and wetted it again. I think washed the metal and any excess I moved around and let seep into the flock ONLY, don't touch the wood with the black wash. I took a picture of it wet so you can tell where the wash should sit. Remember, a light wash, the lighter the more color you will maintain, the heavier (less water more paint) the darker it will be. 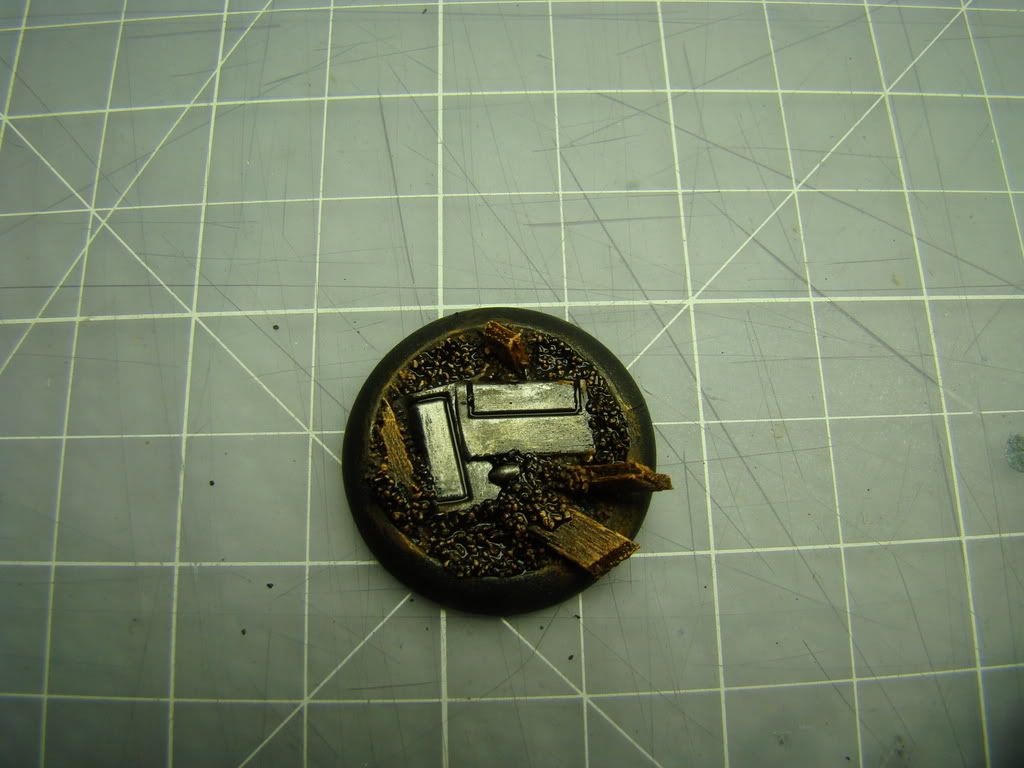 |
|
|
|
Post by privateryan on Aug 22, 2007 18:35:50 GMT -5
[glow=green,2,300]VIOLA![/glow] You are done! Just clean up the outer circle ie. the base and seal the base with spray and you are all set. I hope you enjoyed this tutorial, it is an easy process once you get it down and you can pump out display-worthy bases in no time flat!!! If any of you decide to make a base using this tutorial please post your pics of the final product I would love to know whether it was helpful or not! 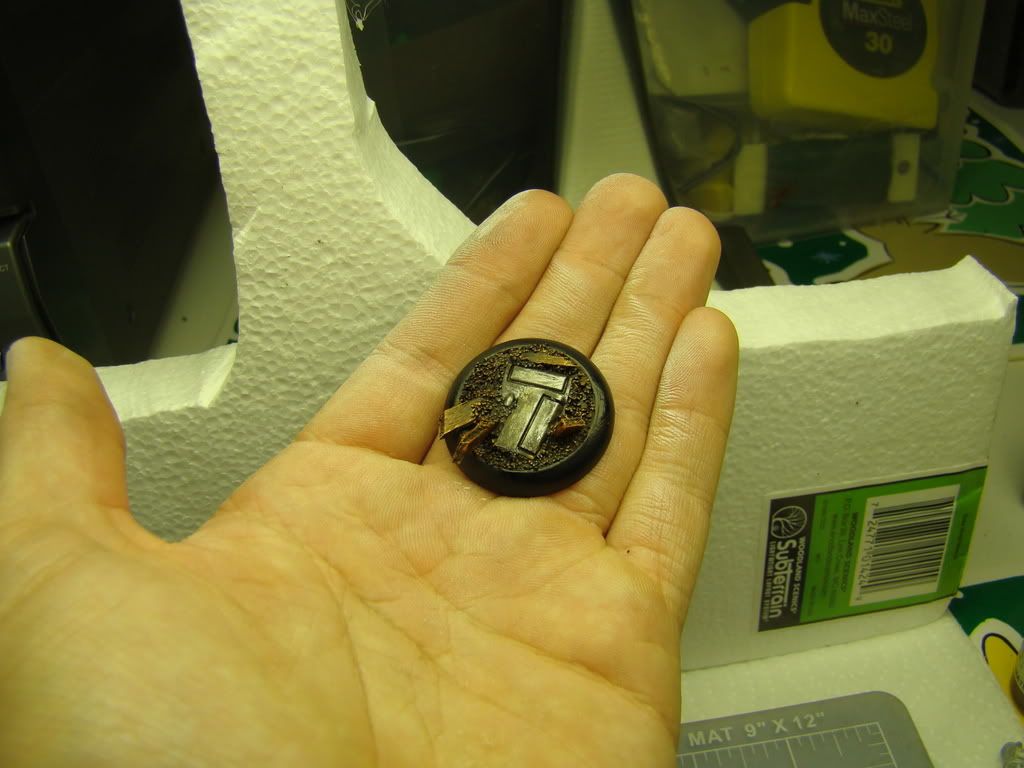 |
|
DFlynSqrl
Corporal
 Have jetpack, will travel.
Posts: 137
|
Post by DFlynSqrl on Aug 23, 2007 20:36:23 GMT -5
Nice tutorial privateryan. Thanks for the info.
|
|
|
|
Post by privateryan on Aug 24, 2007 12:00:33 GMT -5
Thank you. I mean, there is nothing exceptionally creative here, nor is it anything really new, I just thought i'd tell people how I do all my bases as it seriously takes me all of 10 minutes. I will be posting a tutorial on how to add lights to terrain, working lights, and how to make them look weather-beaten and rusted out. How to even make them flicker! I hope this piques someone's interest!  |
|
|
|
Post by boomgoose on Aug 28, 2007 13:08:35 GMT -5
Looks good. Very inspirational.
|
|


